In this article I explain what speakers I used, the size, how I mounted them and what the sound quality was like, hopefully, helping you decide the next step in replacing or upgrading your E46's speakers.

This post contains affiliate links. Please read my disclosure for more info.
Full Speaker Install or Just Upgrade?
Having had upgraded aftermarket speakers and a Vibe subwoofer in my Rover 25, I'd toyed with the notion of replacing the standard BMW speakers and installing a full speaker system upgrade. I wanted to go one better than the Rover though, and amp the system. However, I quickly knocked the idea on the head as I simply haven't the time (or money) to do a decent job of it.
Unfortunately though, the ageing E46 OEM speakers were becoming a bit lacklustre in their performance, which forced my hand. In fact the front speakers had blown, the hissing, crackling then complete silence was sweet nectar to my ears...

Ease of installation was a priority, so I sought out some direct replacement options. The Rainbow IQ 265.25 came up as the best plug and play option for the E46 saloon, however, the kit also cost a few more pennies than I was hoping ~£240 just for front component speakers.
I got the drawing board back out and decided I'd just get some decent quality, after-market, speakers and use adaptors to fit them.
Symptoms of Blown E46 Speakers
The video below shows what sort of sound quality, or lack thereof, I was having to put up with from my E46's blown front speakers.
Even some first gen iPod headphones would have been an upgrade, nonetheless, I wanted some half decent gear.
E46 Speaker Size
The standard E46 saloon / sedan front door speakers are a bit of an odd size, due to the lack of depth in the door, the largest aftermarket speaker you can fit is 5.25" mounted on an adaptor. The rear speakers are more of a standard depth, but again 5.25" with an adaptor is the limit.
Having snooped around various forums fishing for lessons learnt, I found you needed a specific size of tweeter too, 1" is the max size that would fit without too much modification of the existing carrier.
After spending an age comparing power output, size, price etc. I settled on the following:
- Front: Infinity Reference 5030cs 5.25" (130mm) Component Speakers
- Rear: Infinity Kappa Series 52.9i 5.25" (130mm) Coaxial Speakers
I got both sets of speakers and adaptors from caraudiodirect delivered for £130, a much more wallet friendly figure.


Right. Enough flannel, on with the fitting.
How to Replace the E46 Saloon Rear Speakers
With the amount of photos I took this post pretty much serves as a how to guide to replacing or upgrading the front and rear speakers in your E46, you'll need to follow my how to guide for removing the E46 front door casing before you get started though.
I decided to tackle the 'easier' job of replacing the rear speakers first. Technically, there wasn't much wrong with the original speakers, but if you're going to do a job, do it properly and all that.


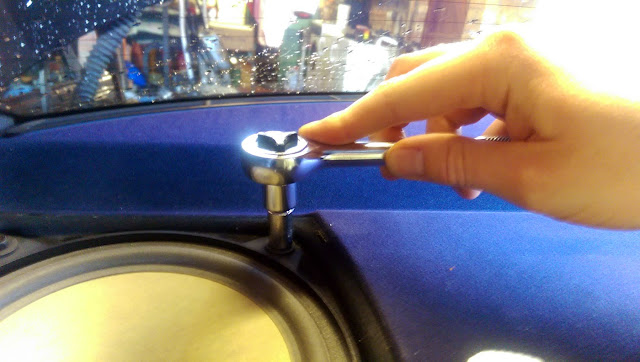
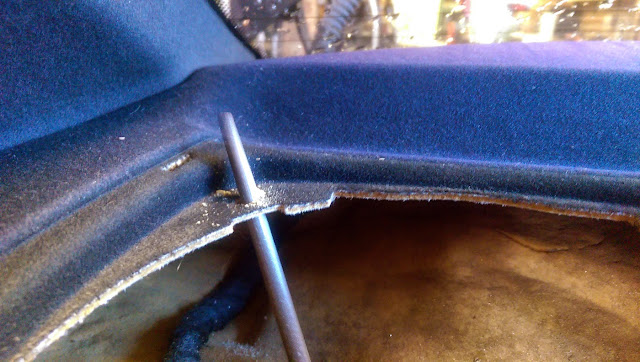
Popping the speaker fret out of the aperture reveals the speaker, you can then simply lift away the foam gasket just resting atop. Remove that and you've got access to the fixings, of which there are three.
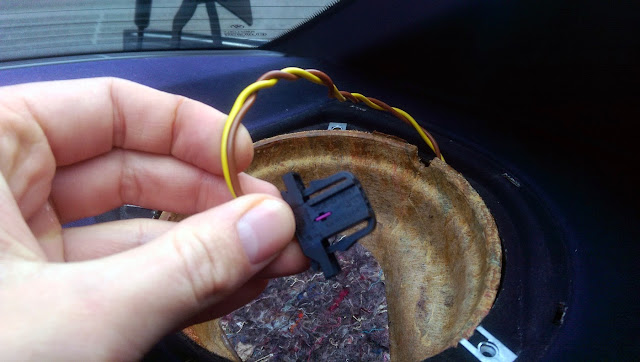
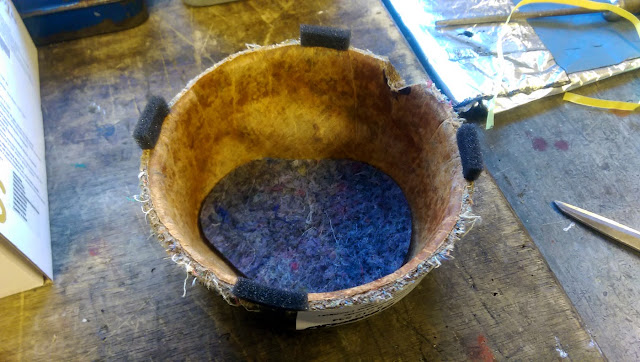
The speakers sit in a sound deadening cup, which I can only assume is to stop sound escaping into the boot, that too is just loose in the aperture and can easily be removed, leaving you with the condition shown below.

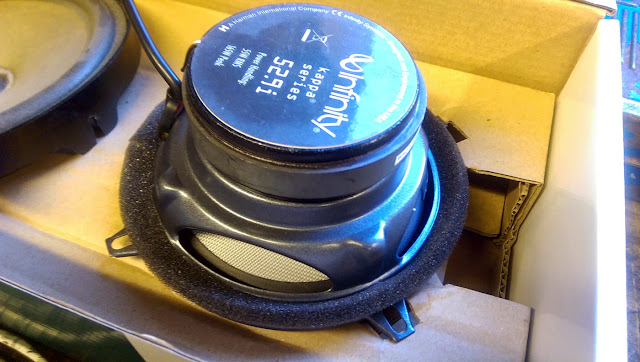
With the speaker out I compared it against the new Infinitys. Ten points to Gryffindor if you spotted the obvious error in judgement I'd made with the new speakers.
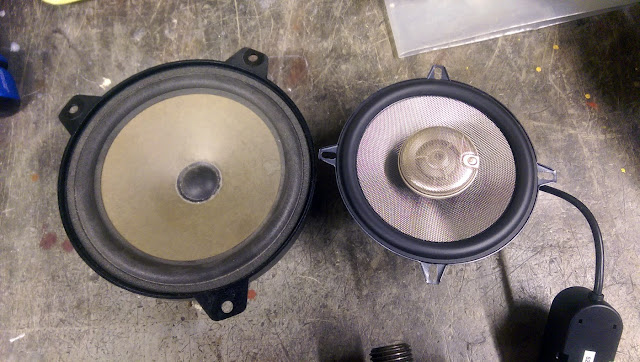
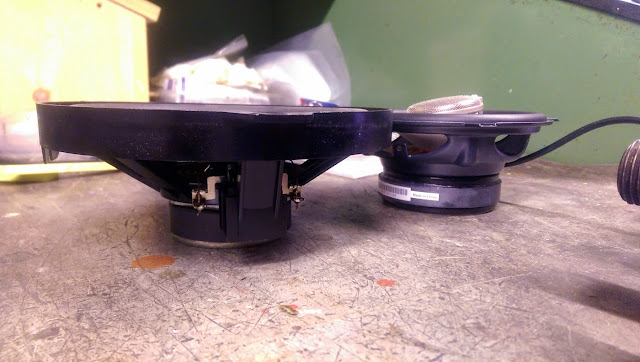
Putting you out of your misery, the new ones have got a central tweeter built in, which just so happens to be protruding from the rim of the cone, and just so happens to be protruding high enough that it would stop the fret fitting, ideal. The drawing board seemed to be a permanent feature in the lab for this project.
I decided the speaker would have to be mounted from below rather than sitting on the parcel shelf, this should give enough clearance to the fret required. However, it would mean some modification to the sound deadening bowl to allow the speaker to sit low enough. Out with the sheers...

The adaptors also needed some err...adapting, too. The three outer holes were all clearance, so the standard bolts would be no use. Gingerly, I tapped the holes out and found six matching bolts in the parts bin.

After a quick test fit of the adaptor on the speaker, it was ready to be wired up. The after market speakers obviously wouldn't take the standard BMW wiring connector so this had to be carefully snipped off. There was also the addition of the in line crossover for the central tweeter.

Before plumbing in the speaker I thought I'd test it in the aperture. Good job I didn't put that drawing board away, those bespoke adaptors specifically for the E46...yeah the holes didn't line up. Out with the file to do some 'engineering refinement'.

All holes now in alignment, I could actually get the speakers in and working. To stop the crossover rattling around with all the 'phat beats' I wrapped it in some self adhesive velcro.

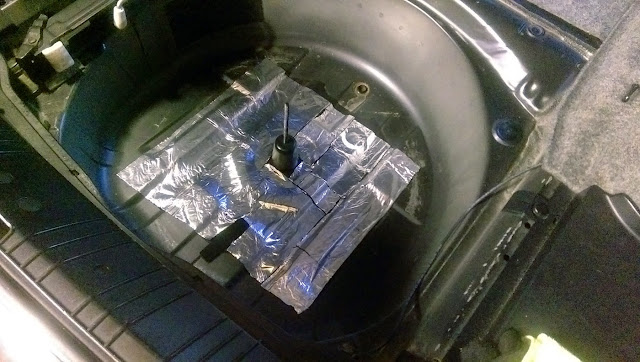
I had a bit of sound deadening left over from my previous car so I put it to good use on the B surface of the parcel shelf, behind the rear seats and in the wheel well. A token gesture but if it makes a small difference then it's a win.


Rears done, now for the front.
How to Replace E46 Saloon Front Door Speakers
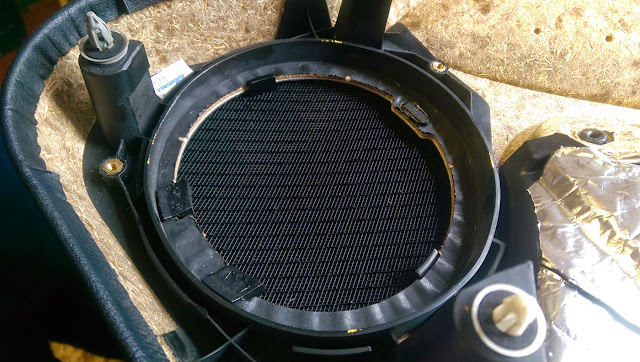
The speakers are mounted to the door casing itself, again with three screws. Similarly to the rear you get some sound deadening encasing the rear of the speaker, although it's in a foam format as a pose to the compressed cardboard type material of the rears.
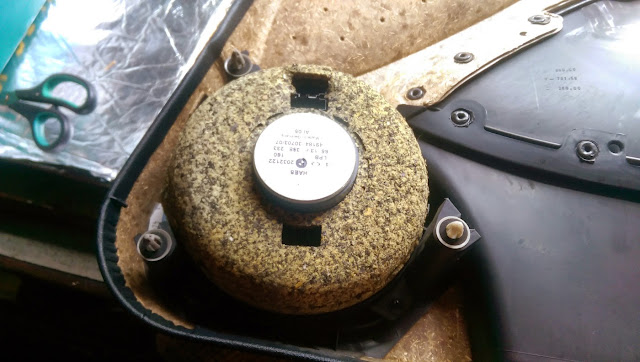

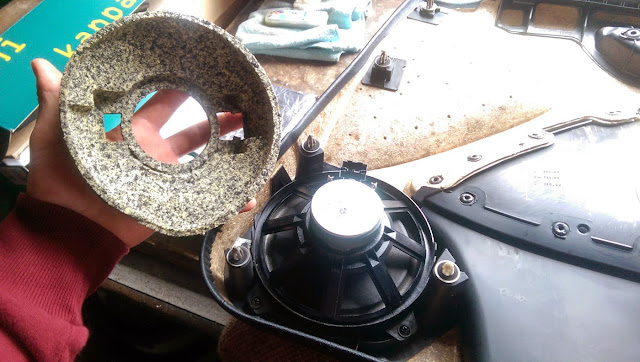

Unlike the rears there is no issues with protruding tweeters, fingers crossed that would mean an easy install. Despite the new speakers being smaller in diameter you can see the difference in magnet size, quite a considerable weight delta too.


Channelling my inner James May, I checked all fixings were present and correct prior to fitment. Nothing worse than getting half way through a job to realise you're a fixing short.

No issues with getting the adaptor fitted to the speaker. A foam seal was part of the fitting kit included in the box with the speakers, a nice touch by Infinity, which just helps to avoid any annoying rattles.


Bringing back the sound deadening I hit a minor snag, the aperture for the magnet to fit through was too small. Handily, there was a perforated ring already cut that you could break away to enlarge the aperture. I can only assume the sound deadening is carry over for the Harmon Kardon speakers that must feature a larger magnet, nevertheless, it worked out quite well for a change.


With the mid range speaker ready to go, next up was removing the tweeter and getting that changed over. The interior frame finisher extends quite unusually to the bottom of the door, which is where the first fixing is located. Removing these is quite tricky, after practising my French for 15mins the trim was out the way enough to access the tweeter.


The foam sound deadening just pulls away. then you can access the single fixing for the tweeter.


Hoping for an easy life I removed the OEM tweeter from the plastic carrier in a bid to use it for the new one. A bit of prying with a small screwdriver and the old one was out. You can see it was rather 'budget' to put it kindly, especially next to the new one.


Feeling lucky I pressed the new tweeter into the carrier, to my surprise it fit rather snugly.


Using more of the left over deadening mat I set about the door casings and metal work.


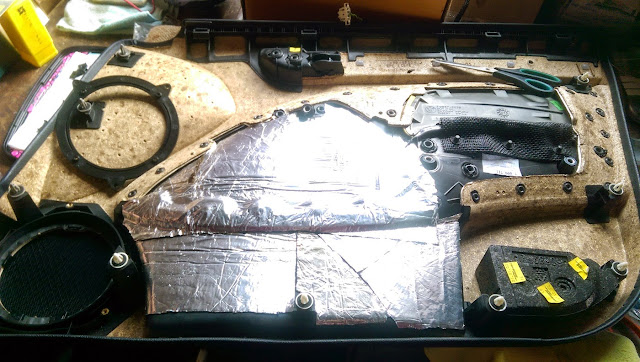
Final job, fitting the crossover and wiring it in. Remember that drawing board, yeah well I was back at it. The packaging space in modern doors is tight, due to the sheer amount of stuff they have to have in them, so finding a spot was a bit tricky. Luckily, just above the foam hip pusher block there was a handy little nook.

Using some two part epoxy and a bit of sand paper to key the surfaces, I glued the crossover firmly in place. It needed to be a strong hold, if not it could come loose with time as the door is shut.


As with the rear speakers, the bespoke adaptors were an excellent fit...NAAAT. Out with the file again to open up the holes. Some tinkering later and it lined up.

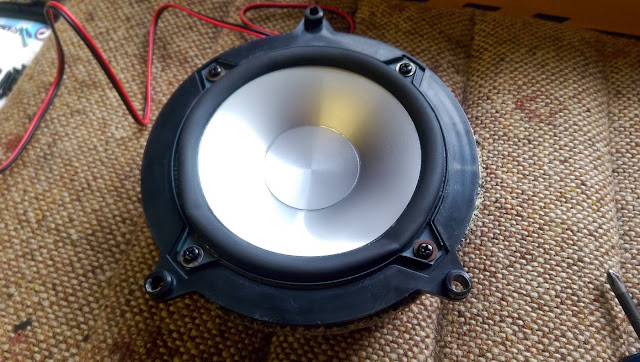
The next hurdle to jump over was getting the speaker to sit flush, creating a seal to the main moulding. Some of the moulding needed to be cut away, but it was impossible to tell where as the speaker obscured the view when in place. Using some yellow marker paint on the raised parts of the speaker I pressed it firmly against the moulding hoping to leave a mark. It worked just well enough, you can see faint marks in the right hand picture below. Using some snips, and exercising some trial and error, the plastic was locally removed enough to fit the speaker.

There wasn't enough wiring included with the speakers for the job, rather disappointingly, so I used a bit of Vibe wiring I had left over from a previous install, good quality stuff too. With everything in place I taped the wires down, to avoid them going where they shouldn't (window mechs for example).


As mentioned previously, you don't want the crossover coming loose. So, my Dad devised a simple lightweight addition, some foam that would compress the crossover against the casing. If the glue failed, hopefully the tension in the foam would keep it in place.

With the brunt of the work done, all that remained was to put everything back together and pump up the volume.
Joking aside it was absolutely blissful to have speakers that created music not noise and, although there were a few hick-ups along the way, the install went fairly smoothly.
I'd recommend the Infinity brand to anyone wanting decent quality sound at a price that doesn't break the bank. You aren't going to win any awards without them amped up mind, but still, not too shabby.
Make sure to subscribe using the Follow by Email widget in the top right for plenty more content to come!
You can also follow me on Facebook, Instagram and YouTube, search andybuck123.
8 Comments
Very informative guide Andy Buck, I do seem to have noticed a slight porky pie that you have told us though! It seems you have said, and I do quote...
ReplyDeleteUsing some two part epoxy and a bit of sand paper to key the surfaces, I glued the crossover firmly in place.
But there are some 'old man' hands in the picture that you have uploaded. Am i correct in assuming that this was actually not you and was in-fact an older gentleman helping you. The basis for my argument is the young man hands appearing in many of your other pictures!
Aha! I appear to have caught you out sir.
Yours Sincerely, the Chinese Snorkle.
Well, Mr Snorkle (I assume Mr?), I appear to have been rumbled. Yeah my dad helps with most of my jobs. He was doing the glueing and I the photos, although I did actually do the sticking into place bit in this instance ;-)
DeleteI am afraid the correct title would actually be, Sir Captain Chinese Snorkle III.
DeleteI have been perusing the interweb in search of an upmarket soundsystem for my narrow boat. I don't put much stock in cars you see. They don't float very well!
I have also visited the Dr Dre website and they don't appear to stock the pet bat headphones anymore... I have a little fruit bat i have nurtured since he was discarded by his angry colony...
Do you have any idea where i could acquire some beats for him?
Yours Sincerely, Sir Captain Chinese Snorkle III
What inline crossover did you use in the rear?
ReplyDeleteHey, sorry for the late reply, Blogger isn't notifying me of new comments :-(
DeleteI didn't use a crossover for the rears, it was the existing speaker wire with the original connector removed, then wired straight into the new speakers. I imagine the new speakers have a basic crossover built in to separate high amd low range though.
Hope this helps!
Heyy Andy, i found out youre guide which is a sparkle in my life. But i have question, how does the Croosover (amplifier i guess it is), where it gets power from?? Or it doesnt need?
ReplyDeleteHi there,
DeleteGlad you liked my guide! Hope it comes in helpful.
There are two types of crossover, passive and active, active ones need a power supply, passive ones (like the ones I used) don't, they go between the amplifier and the speaker (drivers).
Hope this helps,
Andy
Andy, did you wire the tweeter straight into the original tweeter cabling or did you use the crossover to wire the tweeter? Thank you
ReplyDeletePost a Comment
Let me know what you think by leaving a comment below.